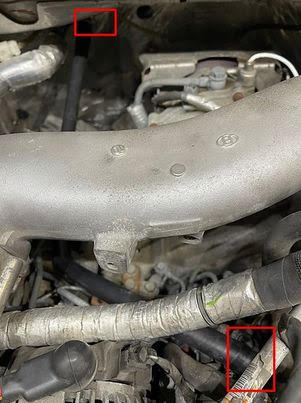
Jack up the front passenger side of the truck with the appropriate safety equipment such as properly rated jack and jack stands, and remove the front passenger wheel from the vehicle.
Pull the front passenger side wheel liner out completely.
Drain coolant system completely by pulling the lower radiator hose on the passenger side. There is a silver metal clip that needs to be removed from the hose end with a small flat head screwdriver or pick tool. You will need a decent sized drain pan for the coolant. Once the coolant is drained completely from this connection, wipe the o-ring inside of the radiator hose to ensure no debris is on it. Wipe the radiator connection to ensure no debris is on it. Slide the hose connection back on the radiator and insert the metal clip back into the hose end.
Remove the down pipe completely out of the truck.
Remove any of the existing coolant hoses related to what was put on there when the off-road modification was done. On the 2011-2016 Duramax LML, there are two types of plastic firewall coolant hose ends. One of them requires a 3/4" quick disconnect tool to be inserted into the plastic hose end to release the locking tabs so that the hose end can be pulled off the heater core. If you do not have this tool, it can be found at any local auto parts store. The other style has two ears which can be depressed with your fingers to release the hose end from the heater core. This style requires you to remove the plastic locking tab ring with a small flat head screwdriver when the hose end has been removed from the heater core.
To remove the coolant standpipe out of the rear engine cover that goes up behind the passenger side of the turbo, there is a single 13mm bolt that holds it in place that will be reused for the coolant block off plug provided in the kit. At this point you will want to put a drain pan under the transmission as some more coolant will come out when this pipe is removed. Remove the 13mm bolt from the stand pipe base. The next step can be a two man process in some cases as these can be difficult to remove. One person in the passenger wheel area is using a small pry bar under the tab of the coolant pipe, while one person from the top is pulling the pipe out in a circular motion. Once the standpipe is removed, you'll want to clean the coolant port of the engine with an abrasive pad such as scotch brite to remove any build up around the hole and to ensure there are no burs!
To install the provided coolant plug in the rear engine coolant port, you will want to use some type of lubricant on the o-ring of the plug. Vasoline, engine oil or a thin layer of grease are all suitable. This is very important to ensure the o-ring does not get damaged upon installation. When inserting the coolant plug into it's location, try to make sure the plug is going in straight and not crooked as this could cause the o-ring to get damaged. In some cases, you can pop the plug in with your hand. If you are not able to seat the plug with your hand, I use a 8" 1/2 extension and gently tap it in from the top until it is fully seated. At this point you can reinstall the 13 mm bolt. Be sure not to over tighten this bolt as it can strip out easily. I use a 1/4 ratchet to 'snug' it up.
Once the plug is installed in the rear of the engine, you will run the provided coolant line from the firewall port (closest to the turbo) up to the thermostat housing. The thermostat housing port you will be using is pictured and I am pointing to it. You will reuse the silver spring clamp on the hose at the thermostat connection. If for some reason you do not have this factory spring clamp, you can use any hose clamp you have laying around. The two o-rings will need to be installed into the billet hose end. You will want to apply some kind of lubricant on these o-rings before sliding the hose end onto the heater core. Once you slide it on the heater core and it is fully seated, you can insert the C-clip into the billet end. This is a very delicate process as the clip sometimes likes to jump out! Once the clip is properly installed, you can give the billet hose end a gentle tug to ensure it is locked into place and cannot be removed!
The provided coolant cap can be installed on the passenger side metal coolant line by the fuel filter housing or where the fuel filter used to be in some cases. See pictures for exact location. This will require a 7mm socket to tighten the clamp down.
You can then refill the coolant system once all coolant components have been installed and finalized, check for leaks, then you can reinstall the down pipe, wheel liner, and front wheel!
Here is a picture of the optional Fleece plate installed:


Comments